
How we use reverse-ETL to better support onboarding clients in HubSpot
As a marketer, customer data plays a central role in almost everything I do at work. I usually start my day by looking at our team’s dashboards to get a sense of what’s working and how we’re doing. Which campaigns are performing and which aren’t? What’s our CAC? What’s the conversion rate on our home page? What does our customer onboarding journey look like? These are just some of the questions data allows me to answer. When it’s clean, organized and structured, customer data can provide an invaluable amount of insight that helps my team and I improve how we work and focus on the initiatives that matter.
But that’s not the only way that we, in the marketing team, leverage the data we have at our disposal. Having recently opened up our product for self-onboarding (free for the first 14 days – try it out!), we needed to find a way to see the progression of new accounts in real-time. This would also allow us to automate the onboarding process, helping users complete their account set-up and experience the magic of Weld quickly. Previously, this would have been a multi-week project involving a range of technical people in the company using a variety of different tools. Luckily for us, we were able to get this done (using Weld, of course) in a few hours, without needing to burden our engineers with a ton of requests or writing any custom code. Here’s how we did it.
Step 1: Sync our product data to BigQuery
The first thing we needed to do was to ensure that our onboarding data would be synced to our data warehouse – in our case, BigQuery. (Side note here: Weld’s philosophy is that every company should have one single source of truth for all their customer data – the data warehouse. Weld works with the most popular data warehouses, including Snowflake, Redshift and BigQuery).
All of our product data already flows into our PostgreSQL database, so we created an ELT sync (called Gather in the Weld product) from our PostgreSQL database to our BigQuery using Weld.
.png)
This is a pretty straightforward process in Weld and took us about 5 minutes: pick which objects you want to sync to your data warehouse, select a sync frequency and choose the primary key on which you want to map your data, and voilà – the data started appearing in our BigQuery in a matter of minutes.
Step 2: Create the data model
Once we knew the onboarding data was being synced to our data warehouse, we needed to create the data model we were going to use for our reverse-ETL sync to Hubspot. Essentially, from the data points we’re syncing from PostgreSQL to BigQuery, which ones do we want reflected on the contact and company level in Hubspot to automate the onboarding communication? For us, we needed to see if someone connected their data warehouse, modelled their data, and created Gather and Activate syncs.
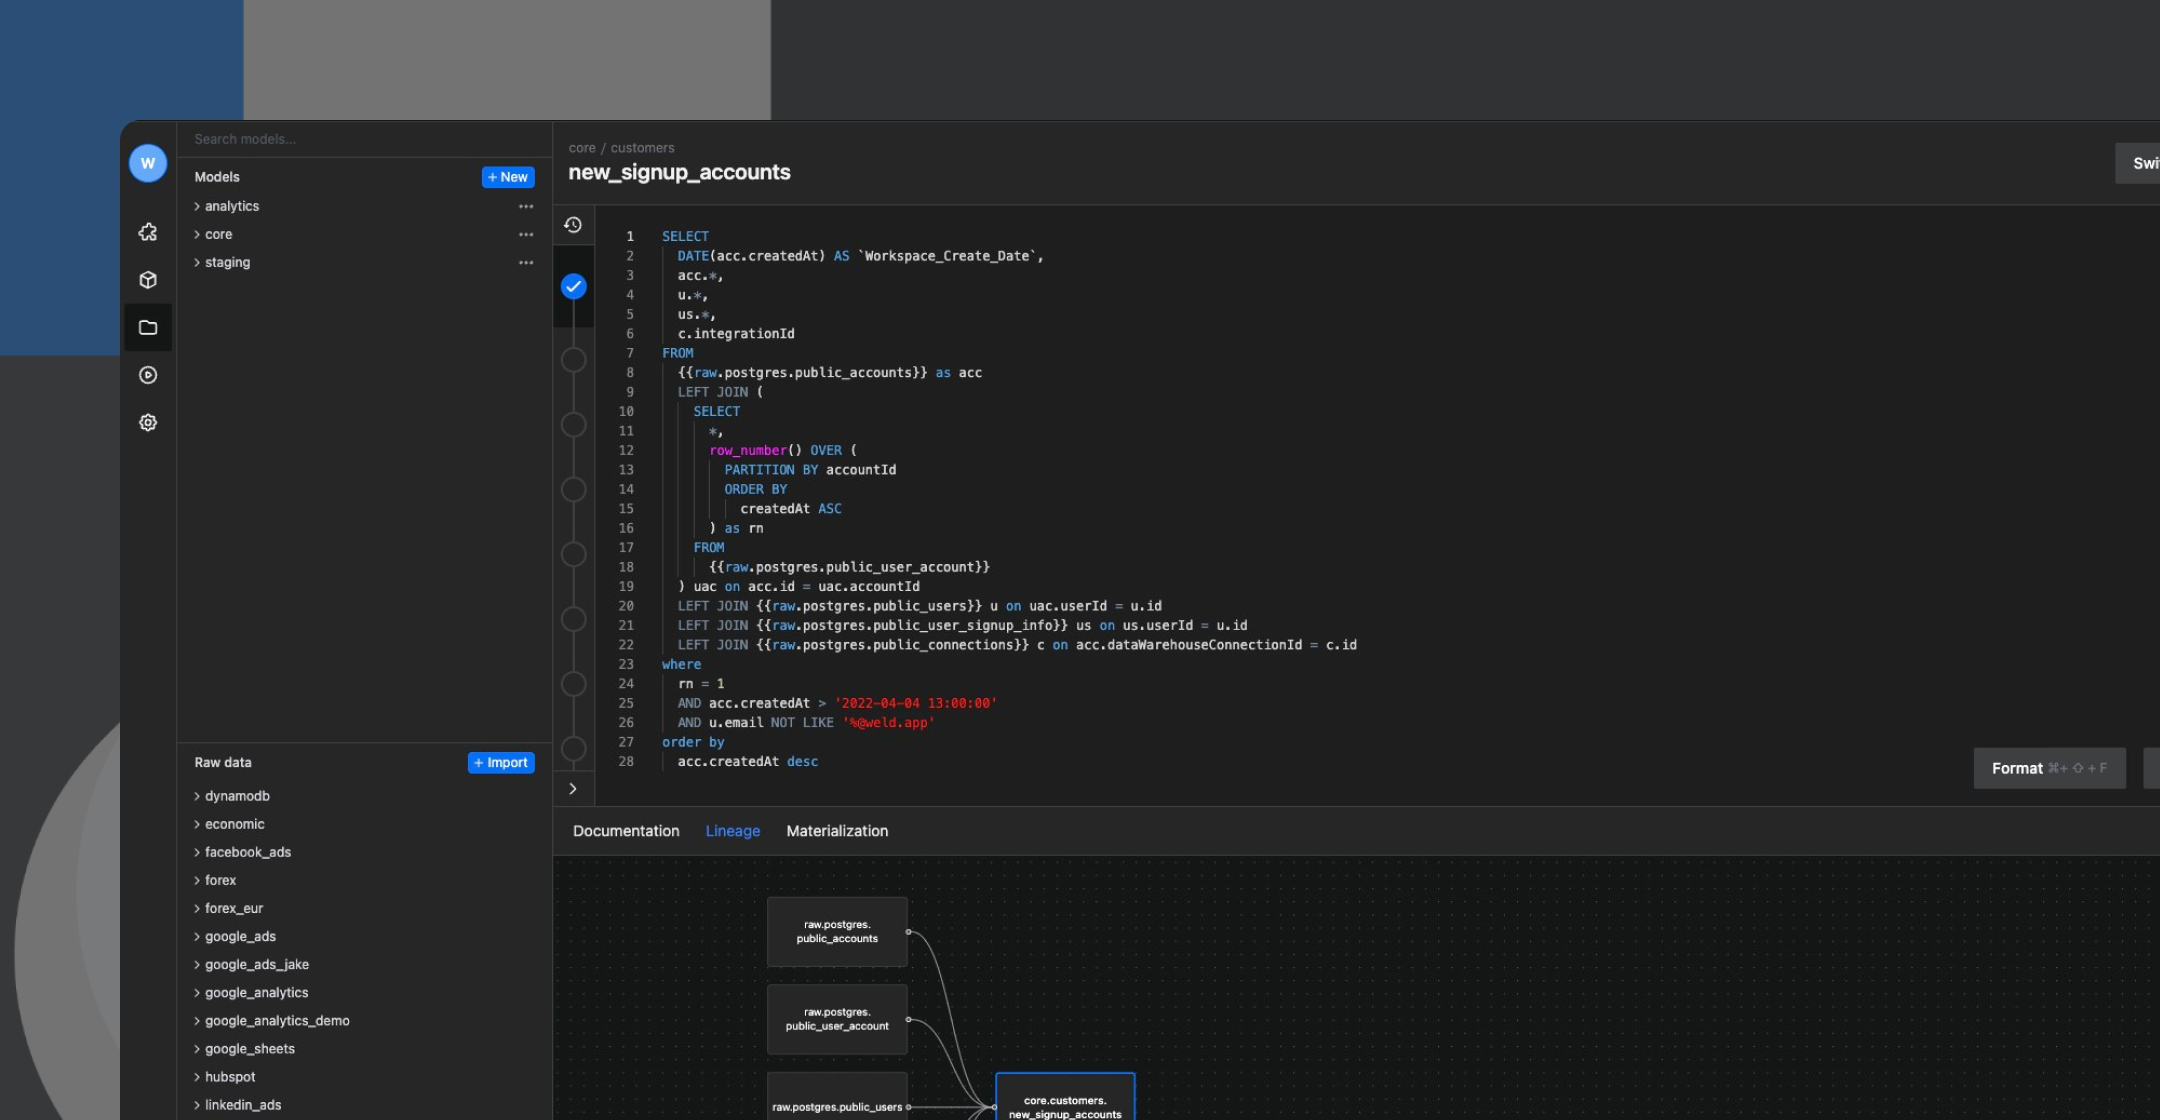
Modelling your data is quite simple in Weld. You write the query directly in your Weld account using the SQL editor – it’s the same text editor as VS Code, so it has a familiar look and feel for most people who have experience with SQL. It also has a few neat features like smart autocomplete, version control and collaboration. Once the model is written, you can visualize the table, and if all looks good, give the model and name and save it. This is what allows us to move on to the next step.
Step 3: Create the reverse-ETL sync from BigQuery to HubSpot
Once we had the model, the next step was to get these data points into our Hubspot account. This was critical to achieving our objectives because HubSpot is the core of our commercial operations – it’s the platform we use for our sales processes and customer communication. This is why we wanted to have customers’ onboarding information directly on their contact properties in Hubspot – and make sure it automatically updates when new information becomes available.
To do this, we first started by creating a contact property group in HubSpot called “Weld properties”. We then created a few properties such as “Account creation date”, “Data warehouse connection date”, “Number of Gather syncs” and so on.
Once the structure of our HubSpot account was ready, it was time to create the reverse-ETL sync (called Activate in Weld) that would push the onboarding data from the data model we created in step 2 to our contacts in HubSpot.
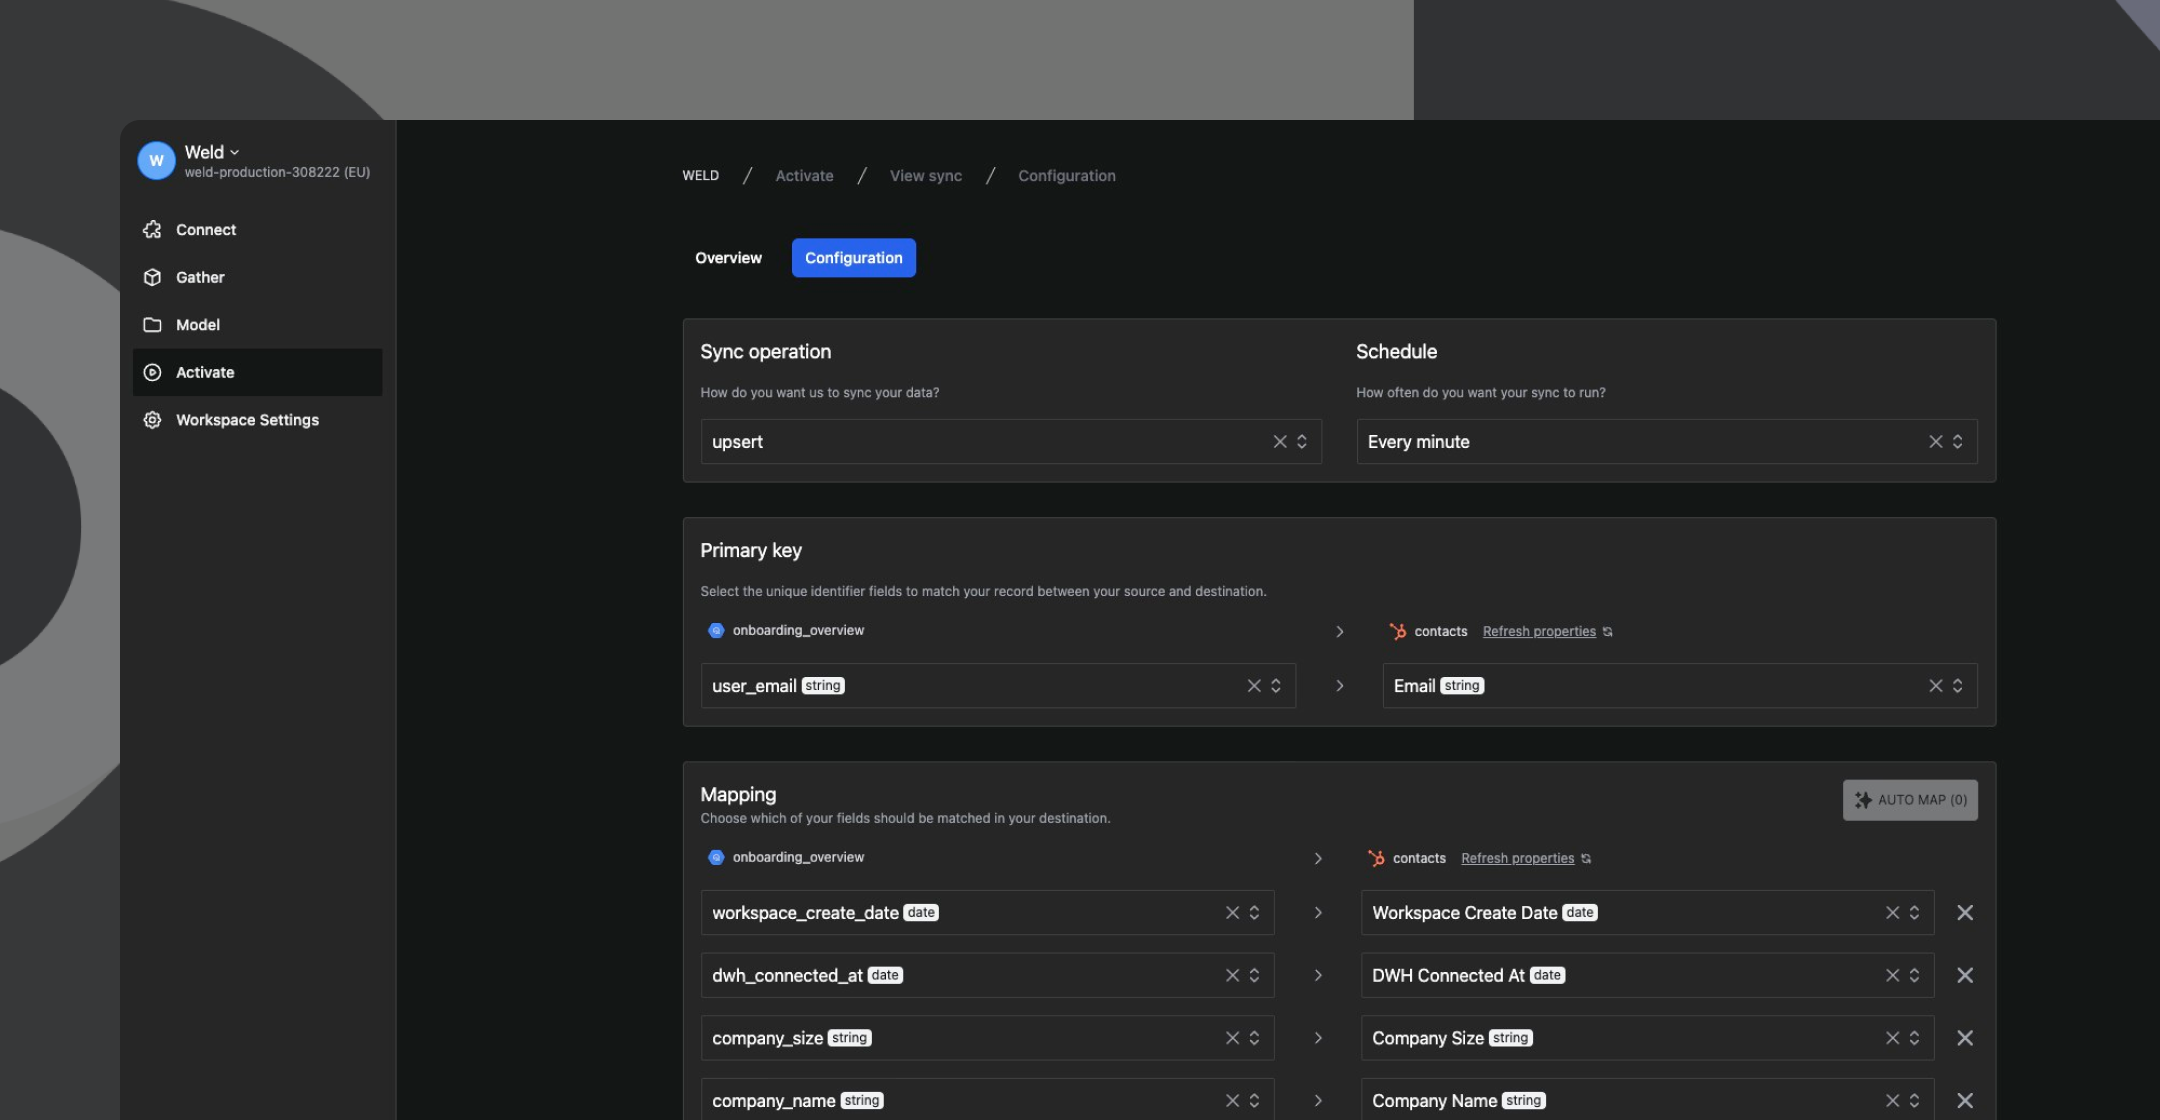
Similar to the Gather sync we created in step 1, this process took us around 5 minutes end-to-end. First, you decide how you want to sync your data (upsert, insert or update) and how often you want to sync it. In our case, we chose to upsert data every minute. Then, we chose our primary key (the unique identifier Weld uses to match the data from the model to the HubSpot account). Finally, we mapped the fields we wanted to sync. This is where you choose which property you want to sync where. Weld also has a neat auto map feature that magically maps model properties to your sync destination properties based on syntax, making things that much quicker and easier! Once that was done, we started the sync and, a minute later, saw the onboarding data appear on our contact properties in HubSpot.
Step 4: Automate in HubSpot
The final step was putting this data to work. Once we knew that all the onboarding data was flowing from our PostgreSQL all the way to our contacts in HubSpot, we just had to decide what we wanted to do with it. Our goal was to set up an automated onboarding email sequence that would guide our users through the onboarding process. Using the data points now available on their contact properties in Hubspot, we were able to quickly achieve this. For example, we created an email that would nudge a user to connect their data warehouse to Weld if their data warehouse connection property in HubSpot was “unknown”, an email that would encourage them to write their first data model if we saw they hadn’t yet done so, and so on.
Conclusion
In less than an hour, we managed to:
- Create an ELT sync to move our onboarding data from our PostgreSQL database to our BigQuery data warehouse
- Write a data model for all newly created accounts in Weld
- Create a reverse-ETL sync to create contacts in HubSpot based on this data model and have the onboarding information update every minute
- Create a contextual automated onboarding email sequence to help our users onboard faster
Before Weld, this entire flow would have taken me (and most companies today) days, if not weeks to create and set in motion – getting engineers involved and having to patch together a variety of separate tools for ELT, modelling and reverse-ETL. Weld makes it a lot easier for analysts and non-technical people like me to derive actual business value from customer data in a very short amount of time. If you’re using Weld and would like some more guidance on how we use Weld internally, drop me a line! If you’re curious about the product, try it out for free!
Continue reading
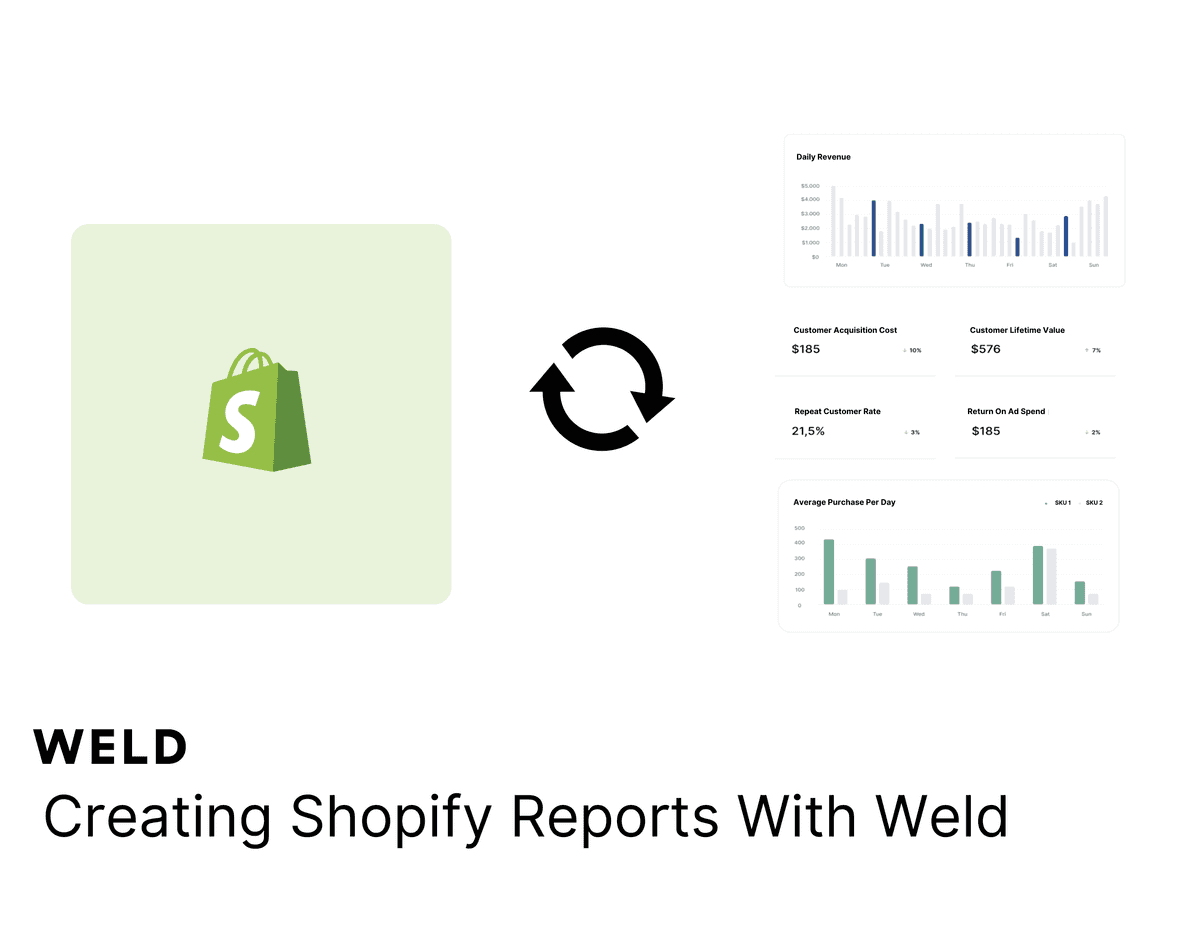
How to set up your Shopify metrics in Weld
Learn how to set up your Shopify metrics in Weld and get actionable insights from your data.
New Connector Alert - Google My Business Profile
Looking to optimize your Google My Business Profile reporting? With our new ETL connector, you can effortlessly integrate your Google My Business Profile data with all your other data sources. Create a comprehensive view of your business metrics, enhance your analytics, and make more informed decisions with ease!
New Facebook Ads Conversion Table
Analysing your Facebook Ads conversion data has now got easier with our new conversion insights table.


